Discover more from Momo's Doodle Den
The Blue Umbrella Window
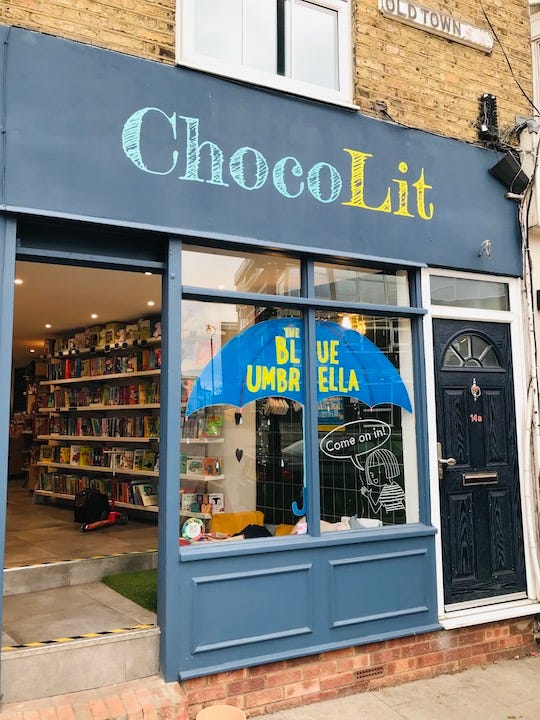
The Blue Umbrella written by Emily Ann Davison and illustrated by me just came out (on 2nd Feb 2023) and my local bookshop, ChocoLit, let me paint their window to promote the book. Back in 2020, I did my very first window painting at Tales on Moon Lane and I wrote about it. I had such a fun day at ChocoLit. I thought I'd write about window painting again. So, this post is a kind of follow-up post to share what I learned from past window painting experiences and how I applied to this window and what I learned this time.
HOW IT STARTED
This is how. I saw my friends - Chris Naylor-Ballesteros and Ged Adamson had painted the ChocoLit's window on Instagram and I commented on the posts. On a separate day, I posted about my then-upcoming book, The Blue Umbrella, on my account, then the shop owner, Martina, sent me a message "Don't suppose you fancy doing an umbrella window and signing?". I said yes!
BEFORE THE DAY
Ask the bookshop for the window measurements - This is very important if you're making a guide template. If possible, recce the venue and see what's behind the window. If not, try to find pictures of the window done by other people to get some ideas. Knowing what you see behind the window from outside helps your window design. For example, ChocoLit had the only one window so I made sure my design has a plenty of negative space so it wouldn't block the view into the shop.
Make the template - Read my previous post on window painting for how to make a template. To print the image at the actual size over multiple sheets of paper, save the image as PDF. Open the file in Adobe Acrobat Reader. Go to Print and select Page Sizing & Handling - Poster.
WHAT TO BRING ON THE DAY
Guide template
Painting material - I used acrylic paints from Flying Tiger (£2 per tube) and Posca pens in various sizes.
Brushes
Palette and jam jar - more about this later.
Sponge - more about this later.
A pot - for water (for brushes, not to drink)
Sellotape - to stick the template onto the window
Kitchen paper - so useful. You can wipe your paint-covered hands, remove excess paint on brushes. If you dump a paper, you can use it as an eraser (acrylic and Posca are water-based paints).
A good black pen - for signing. This might sound vain but practice your signature in advance. Someone might buy your book on the day and you might be asked to sign the copies on the spot. Better be prepared than sorry, right?
Water and snack / lunch - the shop stuff might offer you drinks and food on the day but you should never assume.
ON THE DAY
The shop owner, Martina, welcomed me with enthusiasm. The shop was small but well organised and full of well-curated books. I particularly liked the reading area with cushions right behind the window I was going to paint. After our quick introduction and a nice cup of tea, I got on with the painting.
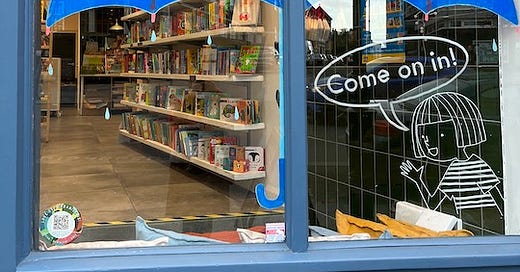
I taped the template from the outside (I was lucky the weather was nice), outline the shapes, took off the template, fill in the shapes and add some free-style elements (rain lines and droplets) - then done! It might sound easy but it took me about 4 hours. (Read the Avocado Asks window post for more about the painting process)
Thoughts on paints - I definitely prefer Posca pens to acrylic paints. Posca is easier to use and perfect for lettering. Unfortunately it's more expensive than acrylic and not good for filling large area. Whatever your choice of paints, I do recommend to use the paint straight from tubes instead of mix them to create your own custom colours. Just because it'll make your day a lot easier. Keep colour uniform while painting a large area could be tricky.
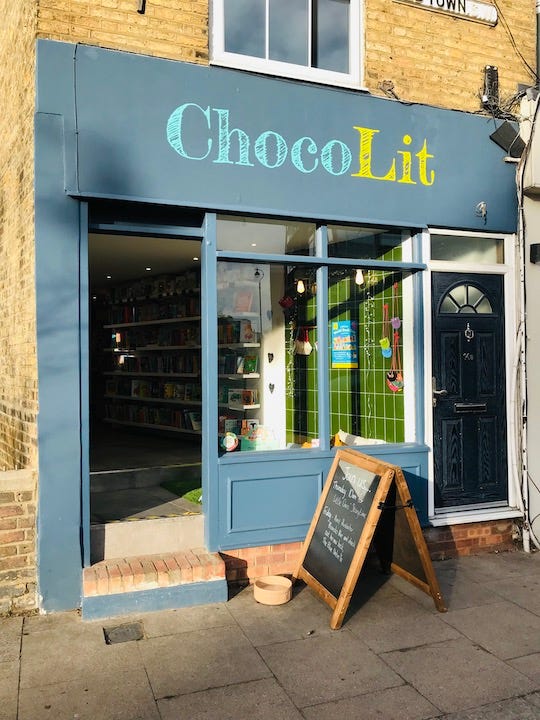
Having said that, in the past, I learned dark colours (e.g. black and blue) didn't show well on windows especially the background (e.g. inside the shop) is dark / dim (see below).
Not to repeat that mistakes, I mixed blue for the umbrella with a bit of white to make it slightly opaque. To avoid inconsistency, I mixed plenty paints in a jam jar before painting.
Thoughts on techniques - I was wondering how to replicate the shadows on the umbrella in my illustration. Luckily, I read Fiona Woodcock's wonderful newsletter on her Frost Goblin window painting and saw her using a kitchen sponge to add some textures. So I tried that and, although it's clear that I needed more practice, I think it worked.
Thoughts on design - I kept the design as simple as possible but I still struggled with some parts. The smaller areas around the title was really tricky to paint even with a thin brush. Next time I will either use Posca pens to do small areas (but it might be tricky to match the colour with acrylic...) or come up with a better design so I don't need to paint around small areas. Hmmm.
One of the good call I made was the girl and the speech bubble under the umbrella. I decided to simply outline them with white Posca. If I had fill them in with colours, it would have added another hour to the painting time. They would have also block the nice view into the shop.
Also, it's important to be adoptable and compromise. I was originally thinking of adding a rainbow on top of the umbrella, but I just ran out of time so I ditched the idea. I think the window looks still good.
FINAL THOUGHTS ON THE DAY
Although there was a room for improvement, I was very happy how the window turned up. I can imagine kids sitting in the reading area and it'd look as if they are under the umbrella from the outside! Wouldn't it fun? I also really enjoyed chatting with Martina throughout the day. She was great with her social media stuff so she took loads of pictures and videos of me doing the painting. It was so very, VERY helpful that I could have just focus on the painting. So, if you're not one of these big names with a PR person to record your events for you, ask your partner or friends to come along and take pictures for you on the day if possible.
Among illustrators, there is a debate whether window painting is worth the hustle. It does require a lot of work and your time. You most likely have to pay for the materials and some materials aren't cheap. The day could be stressful (anything could happen!). And you don't get paid...
Having said that, there are some benefits. Window is an eye-catching promotion that makes your book stand out from the crowd. Bookshops usually stock extra copies if you do their windows and they will push your books to their customers. You get to meet your potential readers and it's a real buzz when someone buys your book and asks for singing on the day (we sold a few copies that day). It's also a great opportunity to develop a good relationship with the bookshop. It might lead to another opportunities (for example, Martina and I chatted about potential school events). Who knows?
So there are pros and cons, but I personally like doing windows as long as I have time to do it. Maybe because I usually create my artwork digitally, staring at screen most of the time, I really enjoy messing with real paints for a change. Anyway, if you're interested in doing window painting, I highly recommend the following blog posts for more useful, practical and creative tips on window painting from these amazing illustrators.
Fiona Woodcock "When I'm painting widows" - I recommend you to subscribe her newsletter, The Woodcock Dispatch.
Shop window top tips from Jane Porter. I also recommend her newsletter, Story Street.
Hope you find this post useful. Thank you for reading,
Momoko x
ChocoLit - Independent children’s bookshop where the Little Book Stall and Harry's Chocolate Emporium have joined forces to bring out love of chocolate and children's books in Clapham Old Town, London,